Innovating Data Collection - Serving Businesses Worldwide

Published On:
May 1, 2026
Multiple-choice questions are challenging and time-consuming to create. With CliqForms, you can easily design and customize questions based on your specific requirements.
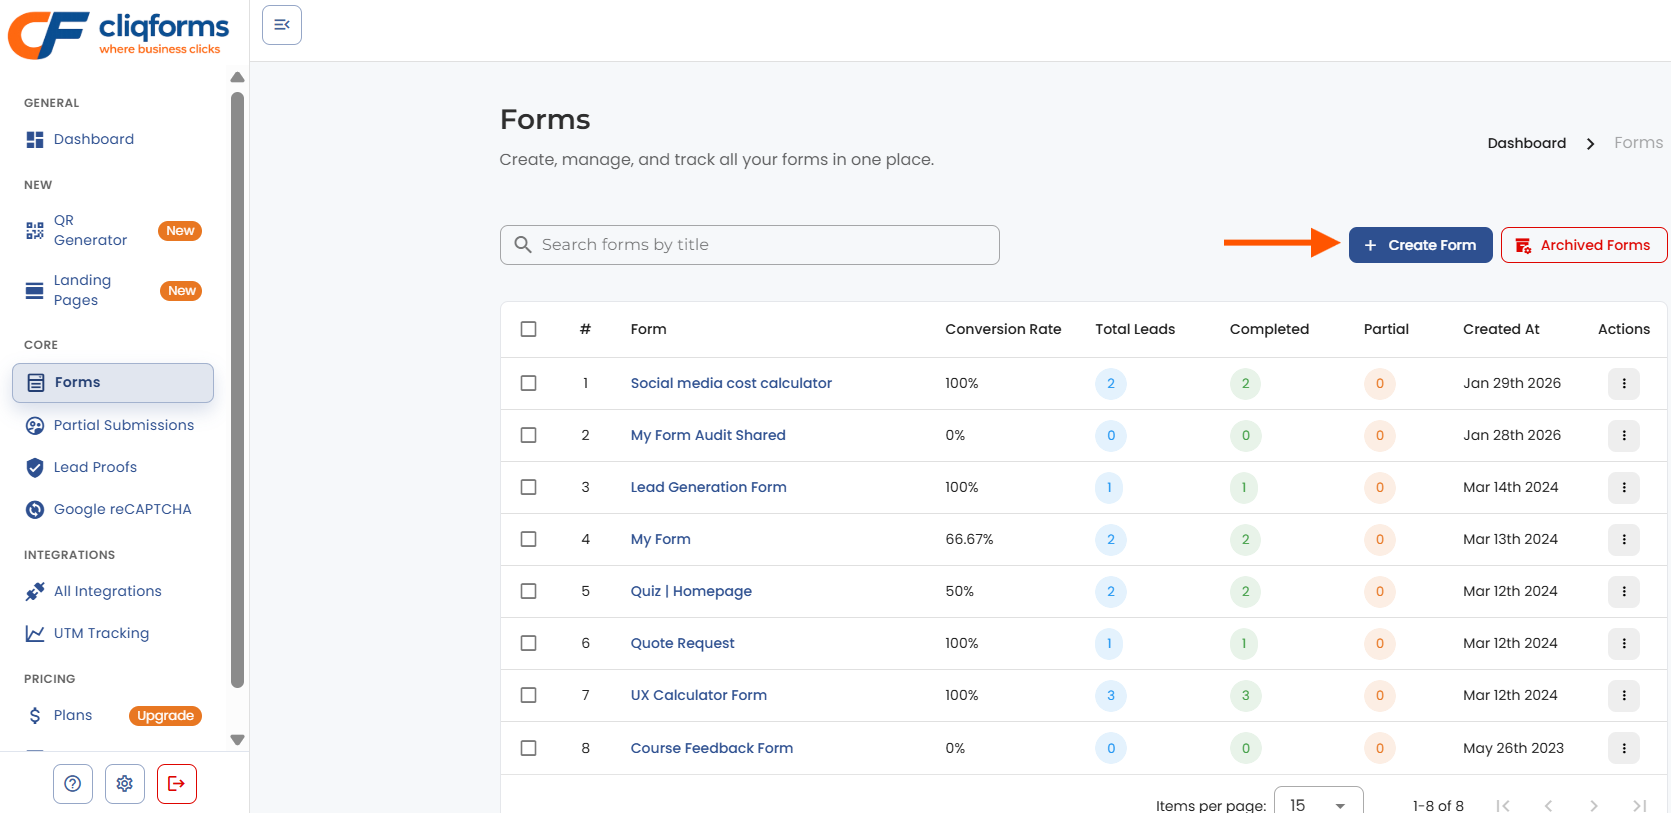
After logging in, go to "Forms."

Create a new form using the button in the top right corner.
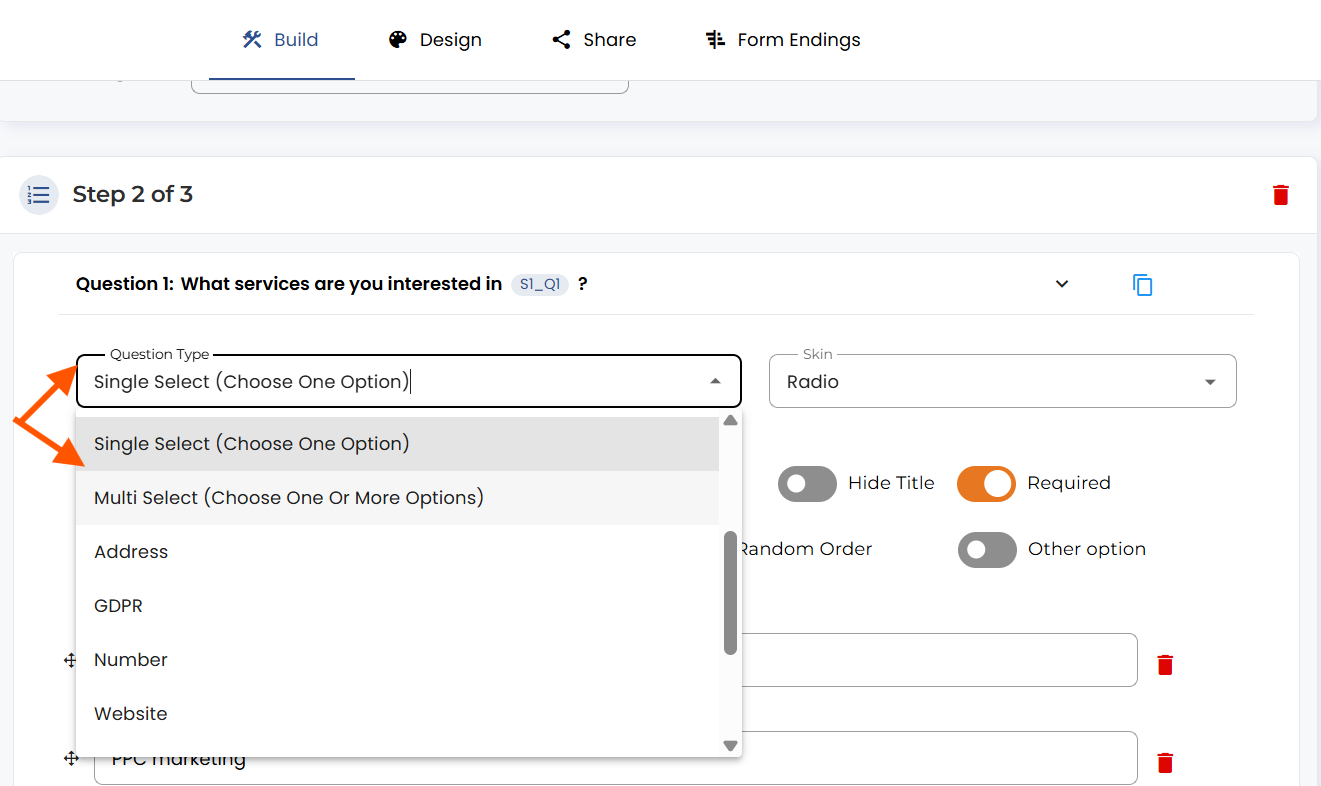
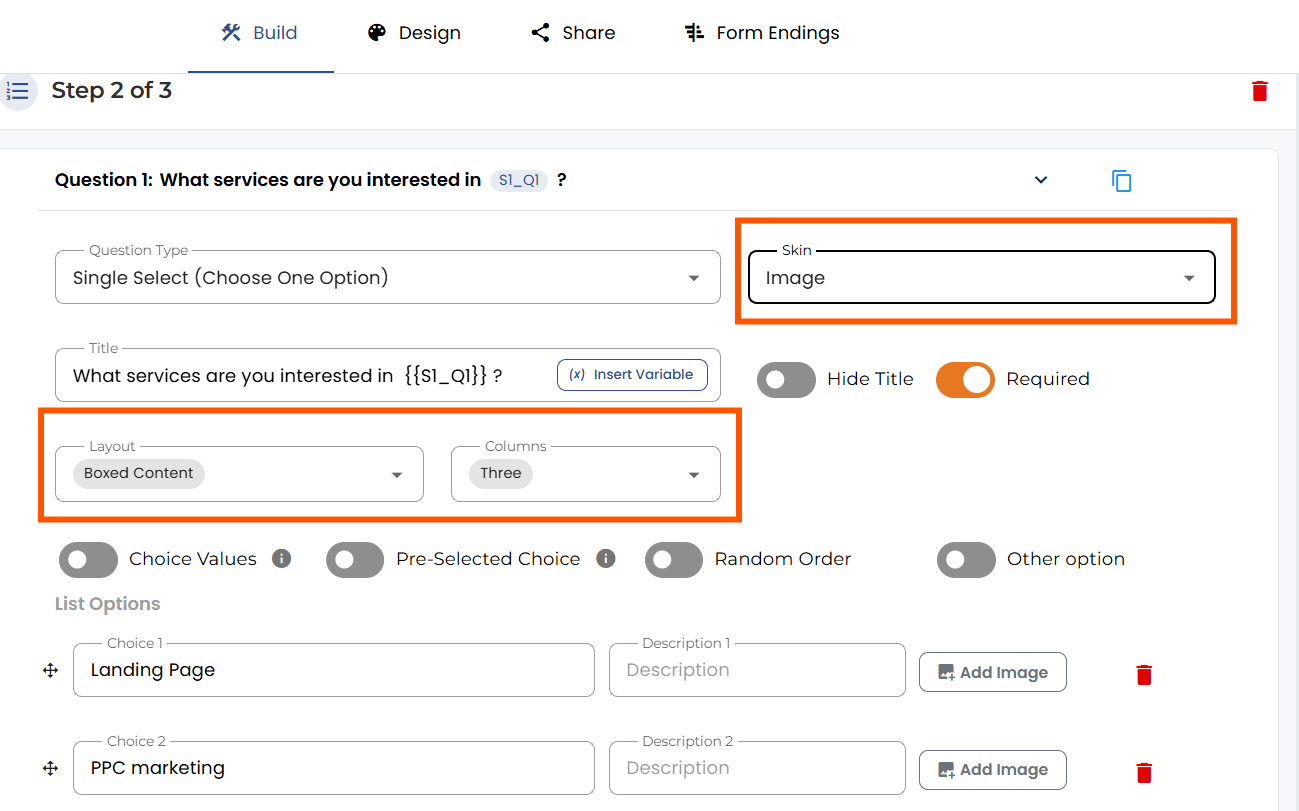
In the “Question type” dropdown menu, you can choose between “Single select” and “Multi select." The first type will allow you to pick only one answer from the options available. In contrast, the second one will give you the option to choose as many as you want, depending, of course, on how you set it up.
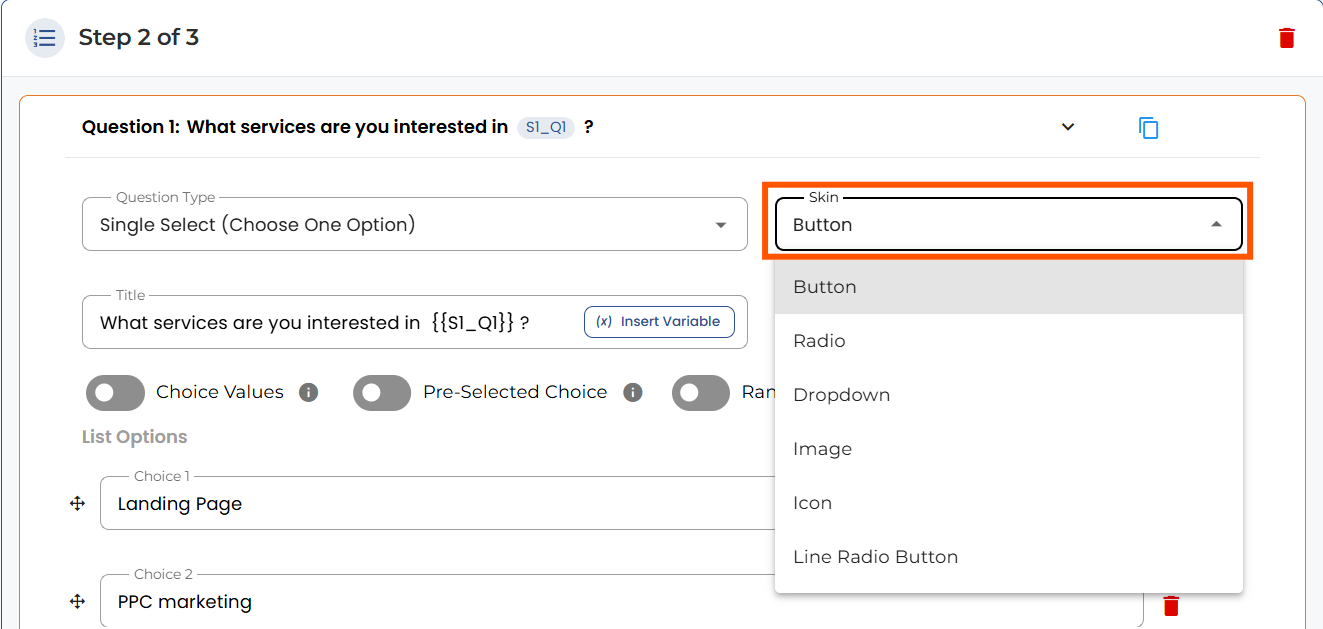
Under the “Skin” dropdown, multiple options will define the question’s overall look. We will show you some examples down below.
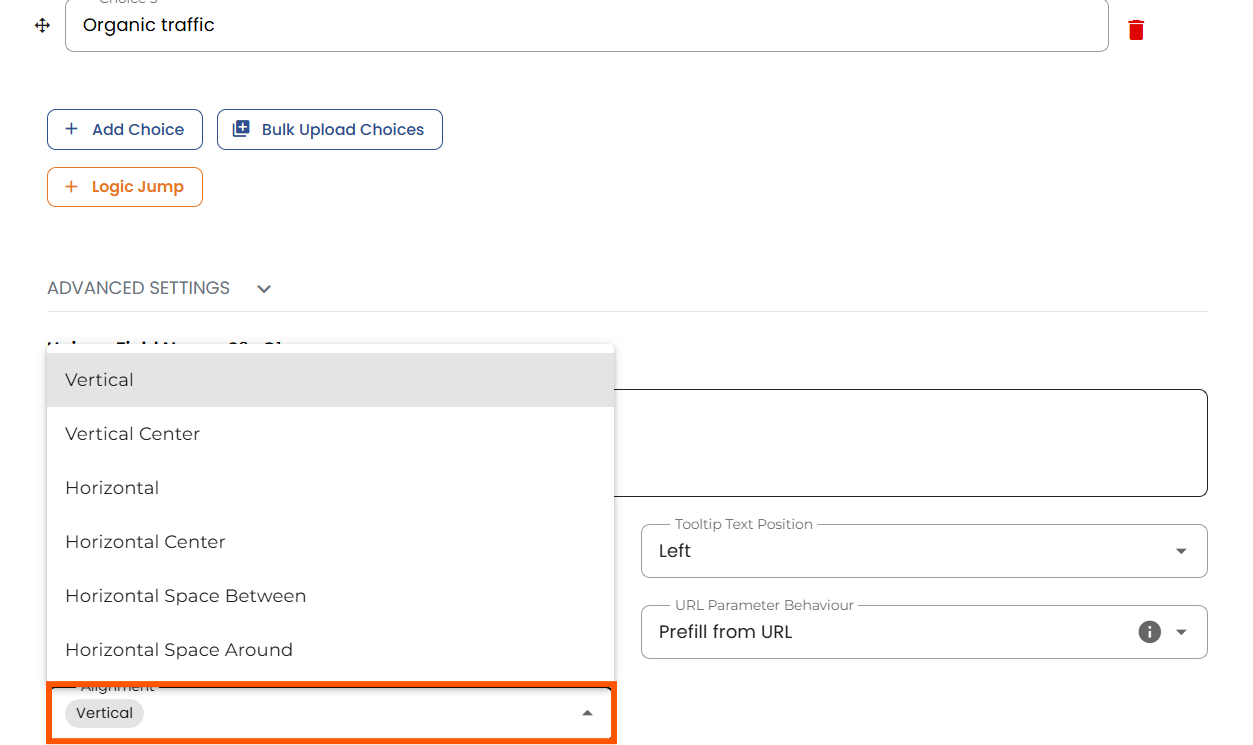
The alignment options will change the way answers appear in the form.
Next, you have the choices section. Here you can set your answer choices.
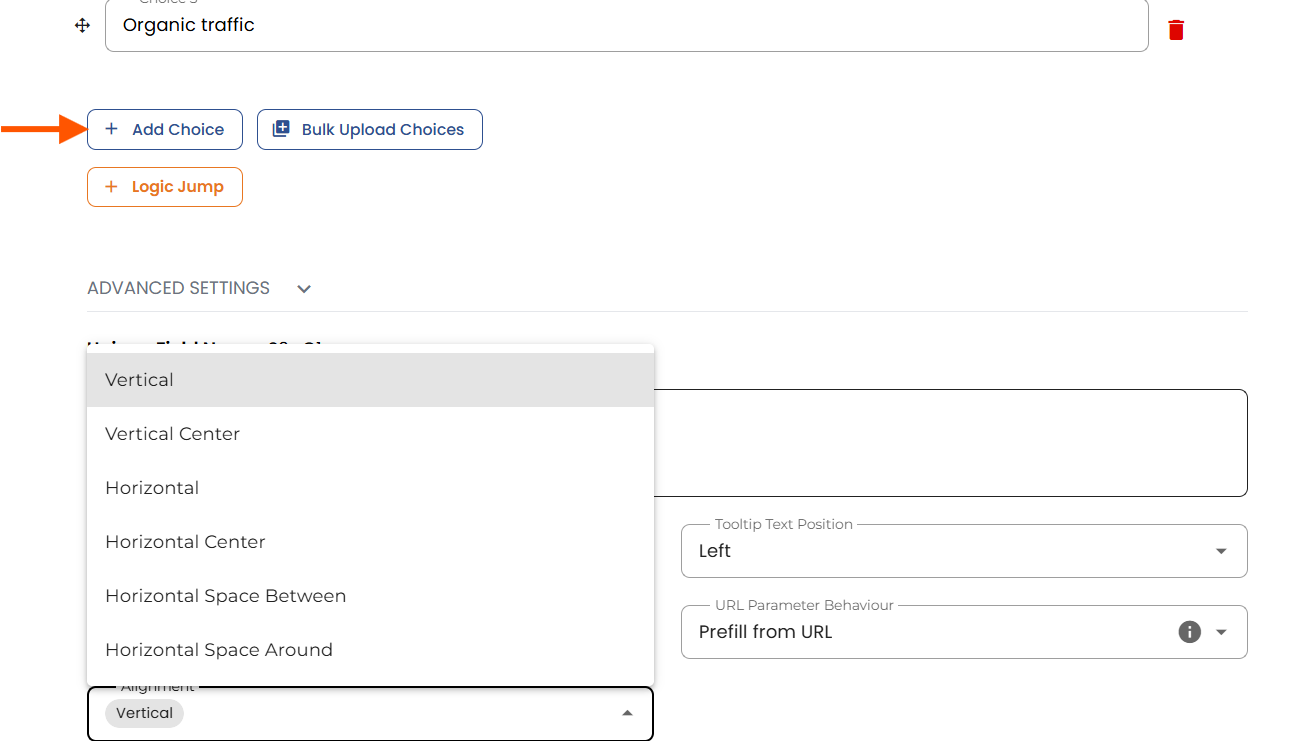
By default, each one will have three choices. If you want to add a new one, click on the “+ Choice” button at the end. If you’re going to remove one, when you hover the mouse over a choice, a “remove” option will appear in the top right-hand corner.
If you select “Image” as your skin, in the choices area, you will see a new field called “Description” and a button called “Image”. You should use the first to add the question choice label and the second one to upload, and then choose the image you want to show for each selection.
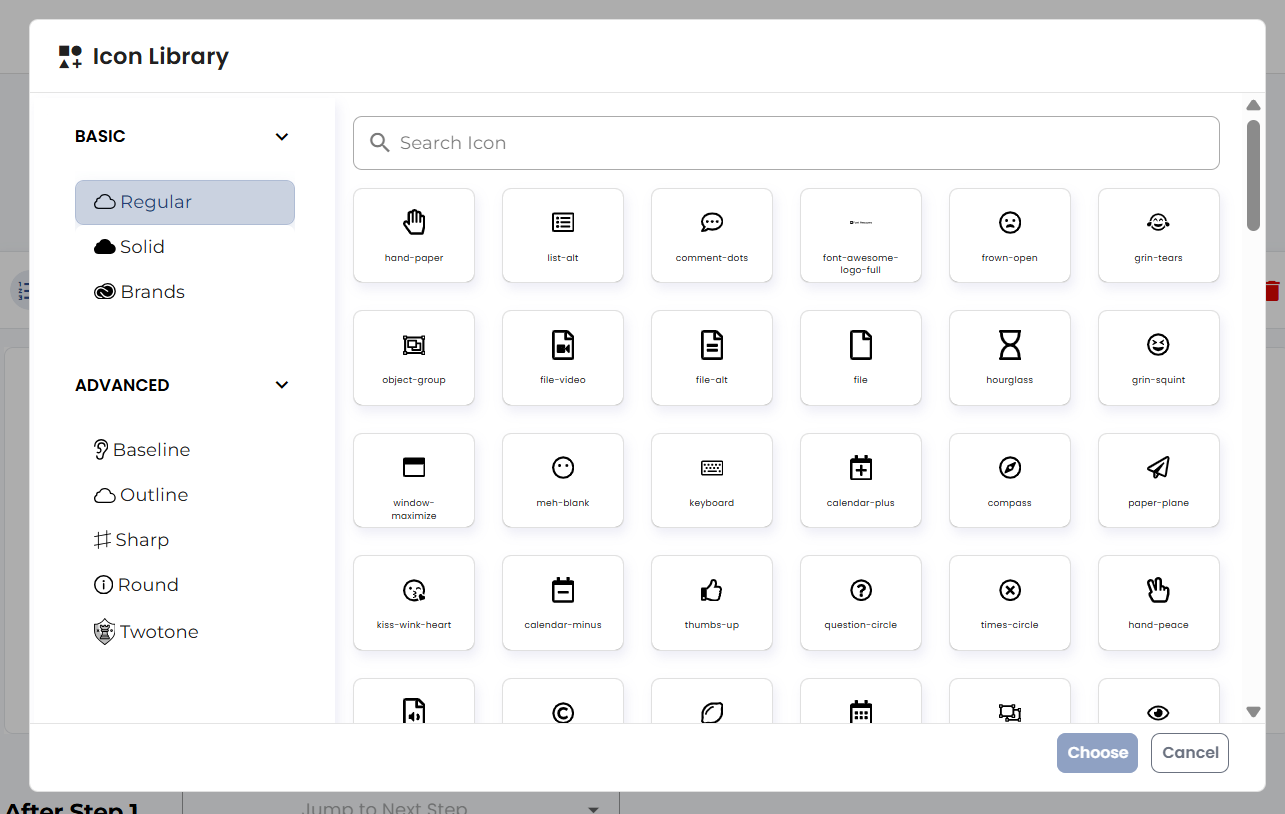
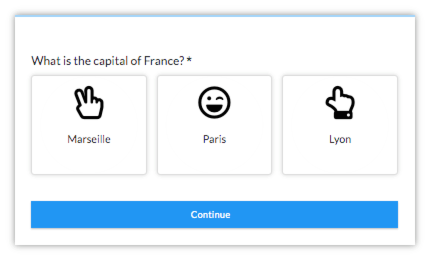
If you select “Icon” as your skin, a “Select Icon” button will replace the “Image” one.
When you click on “Select icon,” the icon library will appear, and you’ll have to choose your icons from this list.
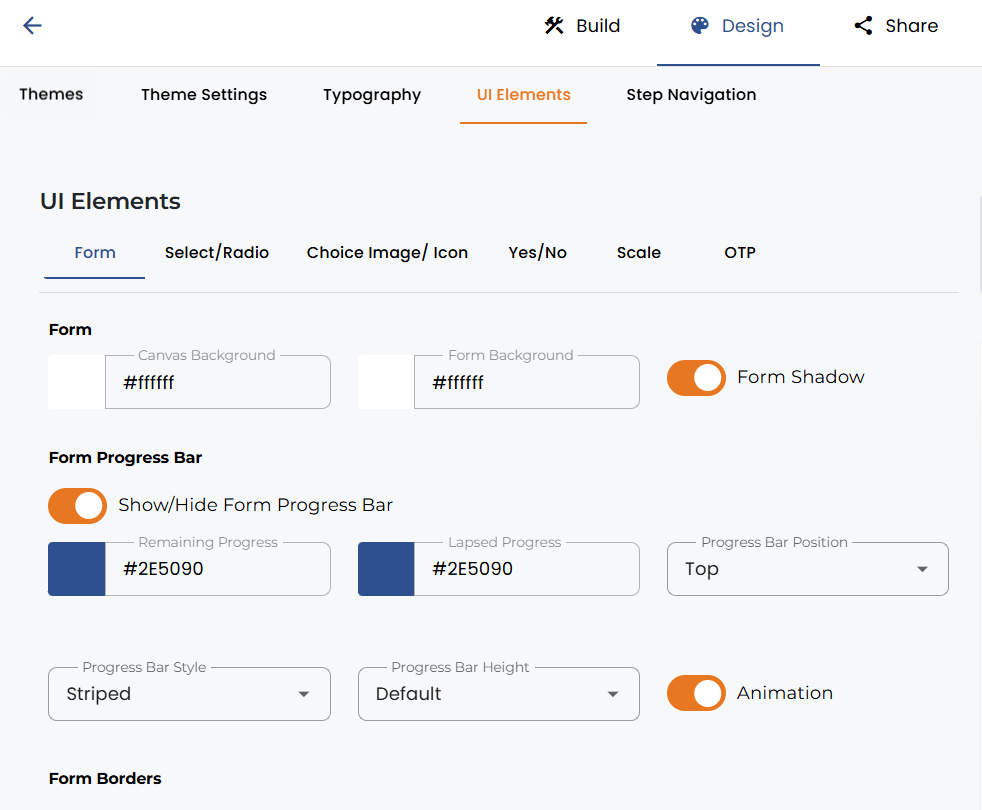
Let’s dive deeper into the design options; click on “Design” in the header.
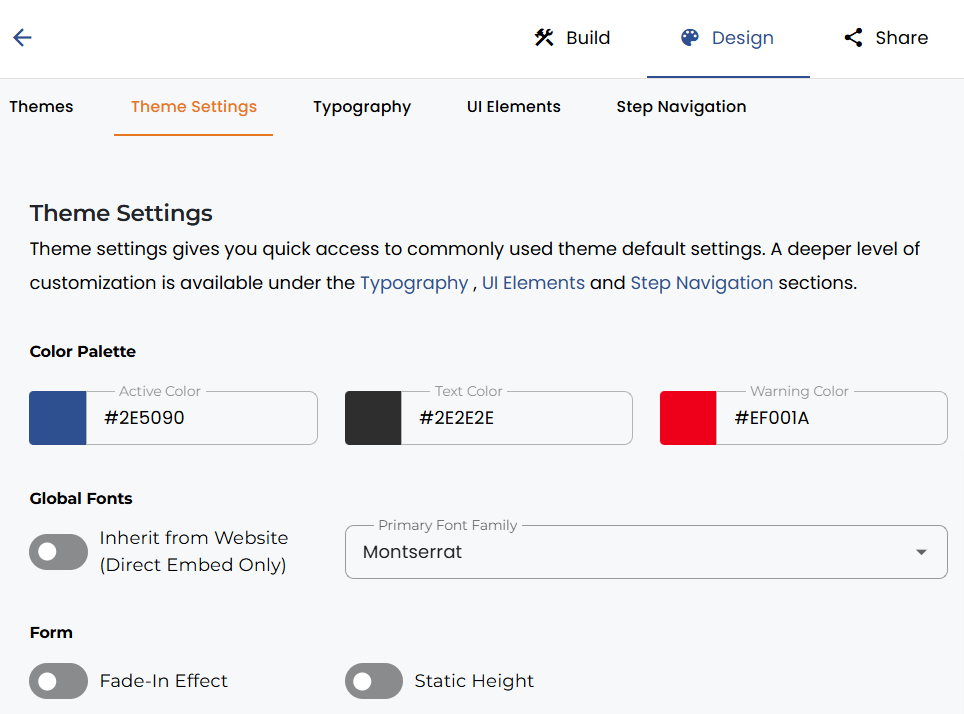
Once you are in the “Design” section, open “UI Elements” and then “Select” from the secondary tab menu. Here you can make changes to the choices available for each question.
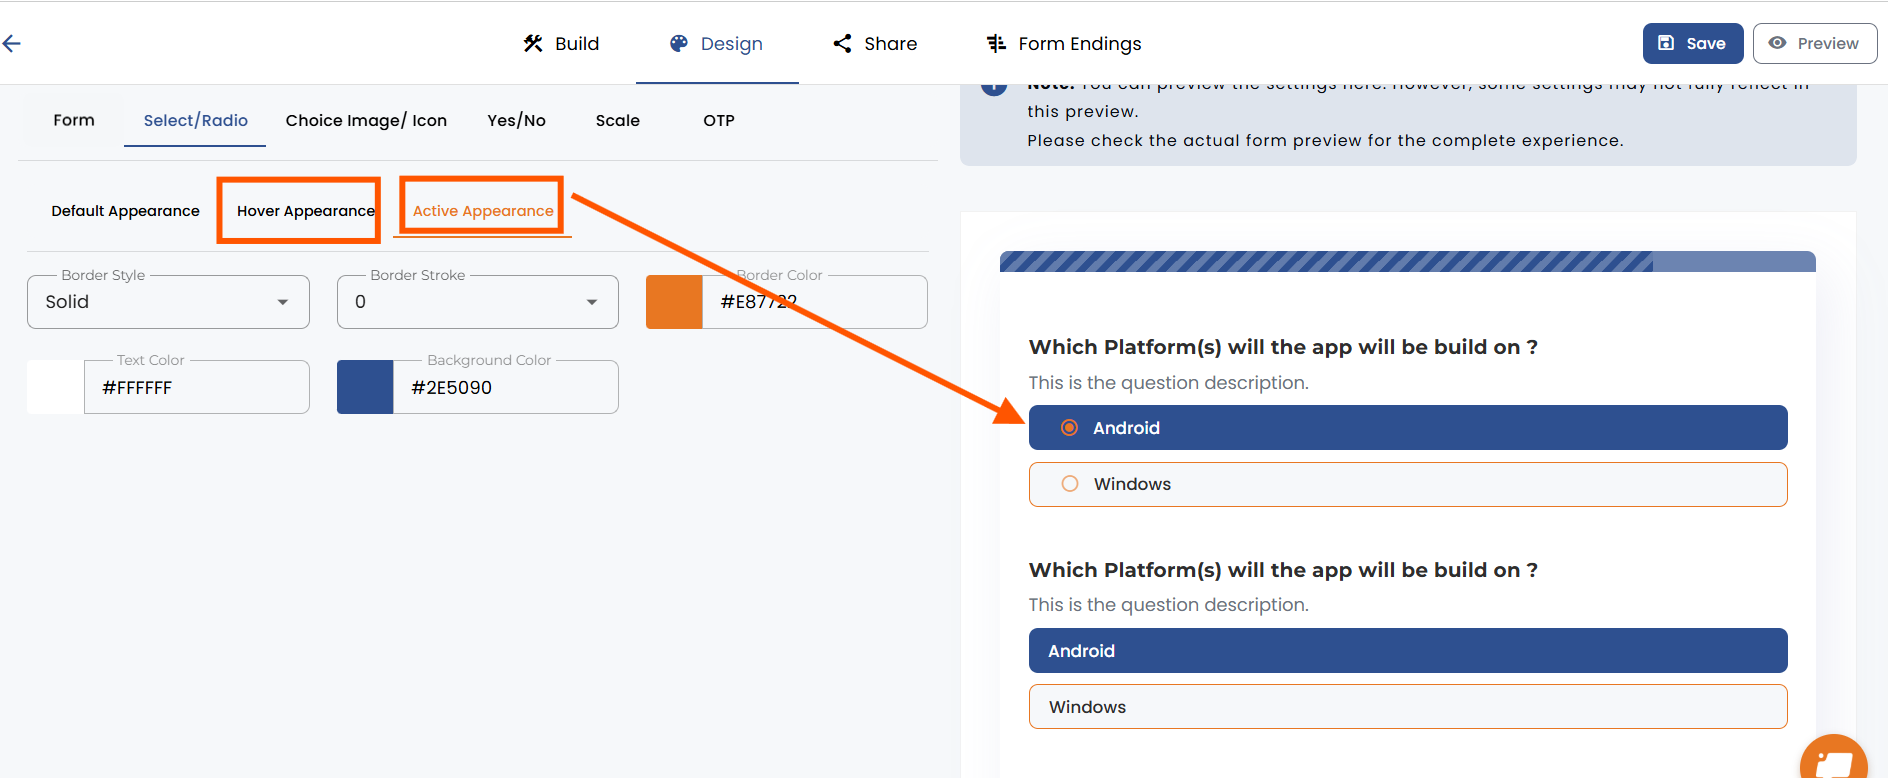
Here is an example where we edited the hover and active appearance (active is when an option is selected).
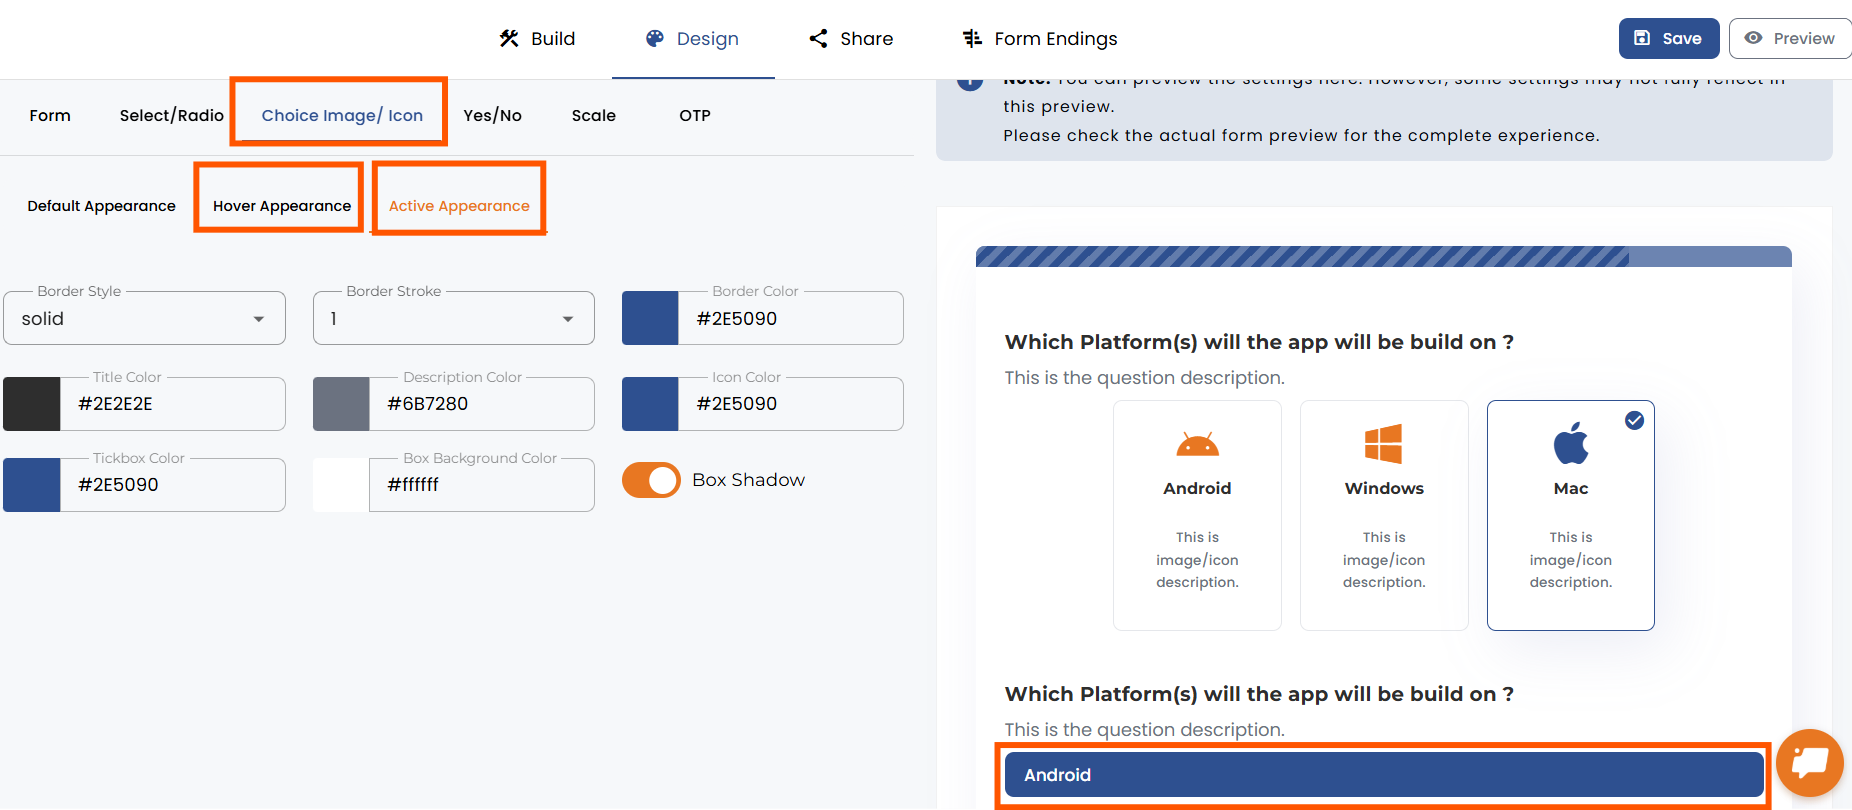
If you choose the image or icon skin, you need to click on the “Choice Image/Icon” tab to change the design. There is a small difference here, as you have different tabs for different states; you won’t find all of them on the same page as above.
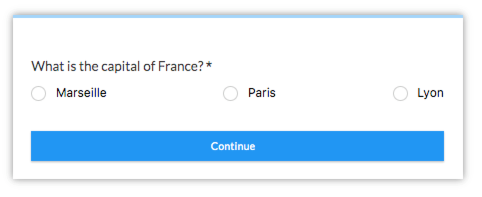
Below, you can see that we selected the “Radio” skin and changed the alignment to “Horizontal Space Between."
Last, we have the “Icon option” together with the “Boxed Content” layout on three columns and “Horizontal” alignment.

.png)
